

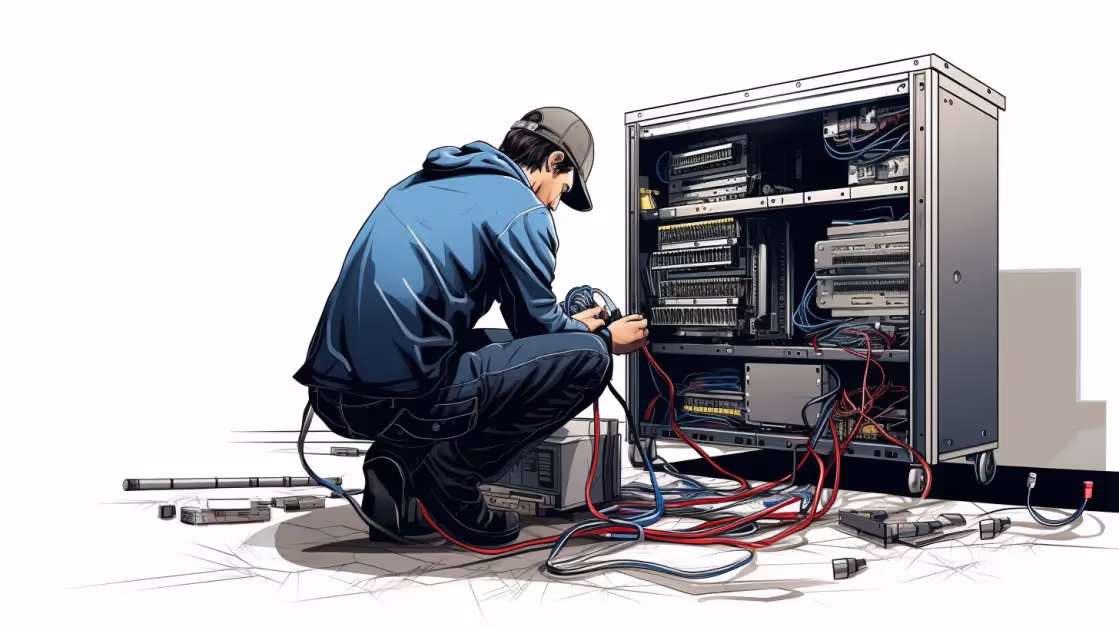
In today's fast-paced technological landscape, understanding the fundamentals of hardware installation is crucial for anyone seeking to enhance their computing experience or dive into the world of DIY computer building. Whether you're a tech enthusiast or a novice user, this article will shed light on the essential concepts, processes, and benefits of hardware installation, guiding you through the step-by-step procedures to successfully integrate new components into your system. Let's embark on this journey to unravel the mysteries behind hardware installation and unlock the potential of your devices.
How do I install hardware drivers?
Identify Your Hardware: Before you embark on this quest for drivers, you must first know thy hardware. Identify the exact make and model of the hardware component for which you seek a driver. Check the manufacturer's website or the hardware documentation for this information.
Go to the Manufacturer's Website: Now that you know your hardware, venture into the digital realm and visit the manufacturer's website. In the hallowed support section, you shall find a treasure trove of drivers for various operating systems.
Select the Correct Driver: Beware, dear traveler, for multiple drivers may be listed for your hardware. Choose the one that corresponds to your operating system and version. Do not be swayed by false drivers, which may lead to compatibility issues and software maladies.
Download the Driver: After finding the chosen one, click the download link, and let the driver enter your computer's heart. Save it in a place of your choosing for easy access during the installation ritual.
Unleash the Installer: Locate the downloaded driver file and double-click on it to initiate installation. The installer shall guide you through the enchanted realms of progress bars and license agreements. Pay heed to the prompts and proceed with caution.
Rejoice!: Hark! The driver installation is complete. Your hardware and operating system shall now dance harmoniously, like two peas in a well-organized pod. Reboot your system if required, and your mission is accomplished.
UCS Logistics - Simplifying IT Asset Management.
What tools do I need for hardware installation?
To successfully conquer the noble task of hardware installation, you require a trusty set of tools. Here are the essentials:
Screwdriver – The Mighty Tightener: Behold the mighty screwdriver, for it can tighten and loosen the bonds of metal and plastic. It is a versatile tool, coming in various shapes and sizes. Keep a Phillips and a flat-head screwdriver in your arsenal, for they shall be your loyal companions in this journey.
Anti-Static Wrist Strap – The Static Saver: Fear the wrath of static electricity, for it can doom your delicate components to an early demise. The anti-static wrist strap, when grounded, shall keep you and your hardware safe from these malevolent forces. Strap it on, for safety's sake.
Flashlight – The Illuminator: In the dark corners of your computer's domain, the flashlight shall illuminate the path to your hardware's abode. Spare not the darkness, for with your trusty flashlight, and you shall easily navigate.
Cable Ties – The Tidy Organizers: The labyrinth of cables can be unruly and chaotic, but fear not, for the cable ties shall bring order to this madness. Bind the cables together, creating a harmonious tapestry of organized connectivity.
Thermal Paste – The Heat Conductor: When the CPU and its cooling apparatus unite, the thermal paste shall be their conductor of heat. Apply it carefully, ensuring efficient heat transfer and keeping the CPU from overheating.
Magnifying Glass – The Detail Revealer: The magnifying glass shall unveil its secrets in tiny connectors and minute details. When all else fails, the magnifying glass shall be your guide.
Spare Screws and Components – The Prepared Provisions: Misfortune may strike, and screws may vanish into the abyss. Keep a stash of spare screws and components, for they shall rescue you from despair.
Patience – The Virtuous Virtue: Remember the virtue of patience. Hardware installation may test your resolve, but you shall prevail with patience as your ally.
UCS Logistics - Simplifying IT Asset Management.
Can you guide me through the steps to install a graphics card?
Certainly! Installing a graphics card can elevate your computing experience to new heights, whether you're a gamer, a content creator, or simply seeking smoother visuals. Follow these steps to bring forth the power of your new graphics card:
Prepare Your Workstation: Power off your computer and disconnect it from the electrical outlet. Place your computer on a stable surface with sufficient lighting.
Check Compatibility: Ensure your new graphics card is compatible with your computer's hardware and power supply. Verify the card's physical dimensions and power requirements, matching them with your computer's specifications.
Uninstall Old Drivers: If you're upgrading from a previous graphics card, it's essential to uninstall its drivers. Access the Control Panel (Windows) or System Preferences (macOS), then navigate to "Device Manager" or "Hardware," and uninstall the existing graphics card drivers.
Open the Case: Carefully remove the side panel of your computer case. Some cases have screws, while others may have latches or buttons to open. Refer to your computer's manual if you need more clarification.
Locate the PCIe Slot: Identify the appropriate PCIe slot on your motherboard for the graphics card installation. Usually, it's the longest slot, closest to the processor. You may need to remove any protective covers or brackets on the slot.
Insert the Graphics Card: Hold the graphics card by its edges and gently align it with the PCIe slot. Push down firmly but steadily until it clicks into place. The bracket on the rear of the card should fit snugly into the case.
Secure the Card: Some graphics cards require additional support. Use screws to secure the card's bracket to the case or any included support brackets provided by the manufacturer.
Connect Power: If your graphics card requires additional power, locate the appropriate connectors from your power supply and connect them to the card. Modern graphics cards often require PCIe power connectors.
Close the Case: Ensure that all connections are secure and that no loose cables obstruct the card's fan or components. Carefully close the computer case and secure it with screws or latches.
Install New Drivers: Power on your computer and insert the installation CD or download the latest drivers for your new graphics card from the manufacturer's website. Follow the installation wizard to install the drivers.
Update and Reboot: After the driver installation is complete, updating them to the latest version is essential. Restart your computer to finalize the installation.
Test and Enjoy: Congratulations! Your new graphics card is now installed and ready to impress. Test it by running graphic-intensive applications or games, and savor the enhanced visuals and performance.
UCS Logistics - Simplifying IT Asset Management.

How to install additional RAM on my computer?
Upgrading your computer's RAM (Random Access Memory) can breathe new life into its performance, allowing it to handle more tasks simultaneously and run applications smoothly. Follow these steps to install additional RAM:
Determine Compatibility: Before purchasing new RAM modules, ensure they are compatible with your computer's motherboard. Check your computer's manual or visit the manufacturer's website for the supported RAM type and maximum capacity.
Purchase the Right RAM: Buy the appropriate RAM modules based on the information from Step 1. Consider factors like the memory type (DDR3, DDR4, etc.), speed, and capacity (e.g., 8GB, 16GB).
Prepare Your Workspace: Power off your computer and disconnect it from the power source. Place the computer on a stable surface with enough room to work comfortably.
Open the Case: Carefully remove the side panel of your computer case to access the motherboard and RAM slots. If you need help, consult your computer's manual or seek assistance.
Ground Yourself: To prevent damage from static electricity, ground yourself by touching a metal surface or wearing an anti-static wrist strap.
Locate Empty RAM Slots: Identify the available RAM slots on your motherboard. Typically, they are positioned near the CPU and marked DIMM slots.
Install the RAM: Hold the RAM module by its edges, align the notch on the module with the key in the slot, and gently press it down. Apply even pressure on both ends until the module clicks into place. Ensure that the module is seated firmly.
Install Additional Modules (If Required): If installing more than one RAM module, repeat step 7 for each module in the available slots. Most motherboards require RAM to be installed in pairs for optimal performance.
Close the Case: After all the RAM modules are securely installed, close the computer case and fasten any screws or latches to secure it.
Power On: Reconnect the power source and turn on your computer. It should automatically detect the new RAM during the boot process.
Check the System: To verify the additional RAM is recognized, go to your computer's operating system and check the total RAM capacity. On Windows, right-click on "My Computer" or "This PC," select "Properties," and view the installed RAM under "System."
Test and Enjoy: Run resource-intensive tasks or applications to ensure the newly installed RAM functions correctly. Experience improved performance and smoother multitasking.
UCS Logistics - Simplifying IT Asset Management.

What precautions should I take before installing hardware?
Installing hardware can be exciting, but taking precautions to safeguard yourself and your valuable equipment is essential. Follow these precautions before diving into the world of hardware installation:
Power Off and Disconnect: Before touching any internal components of your computer or other electronic devices, power them off and unplug them from the electrical outlet. This prevents accidental electric shocks and damage to the hardware.
Ground Yourself: Static electricity can be hazardous to delicate electronic components. To avoid static discharge, ground yourself by touching a metal surface or use an anti-static wrist strap. This ensures you won't inadvertently damage the hardware with static electricity.
Read the Manual: Familiarize yourself with the hardware's installation instructions by reading the user manual or any included documentation. Each device may have specific installation steps and compatibility requirements that you must adhere to.
Backup Data: Consider backing up important data beforehand for major hardware installations, such as a new hard drive or graphics card. Although rare, installation mishaps could potentially lead to data loss.
Check Compatibility: Ensure the new hardware is compatible with your existing setup. Verify factors such as socket type, power requirements, and size constraints. This prevents purchasing incompatible components and saves you from headaches later.
Clean Workspace: Keep your workspace tidy and free from clutter. Remove any unnecessary objects that might hinder the installation or cause accidental damage.
Organize Screws and Components: If you need to disassemble parts of your device during installation, organize the screws and components in a separate container. Labeling them can also be helpful for easier reassembly.
Research and Resources: If you need more clarification on any step, seek additional resources and guides before proceeding. Online forums, tutorials, and manufacturer support websites can be valuable sources of information.
Avoid Force: Hardware components should fit smoothly into their respective slots. Avoid using excessive force when installing parts, as it may damage both the component and the motherboard or other parts.
Check for Loose Connections: Before closing the case or finalizing the installation, double-check all connections and make sure everything is securely in place. Loose connections can lead to malfunctioning hardware.
Verify Cooling: For certain hardware installations, such as a new CPU or graphics card, ensure that cooling solutions like heatsinks and fans are correctly installed and functioning to prevent overheating.
Take Your Time: Rushing through hardware installation can lead to mistakes and mishaps. Take your time, follow each step carefully, and don't hesitate to double-check your work.
Remember, a well-executed hardware installation can significantly enhance your device's capabilities and performance. Taking these precautions ensures a smooth and successful installation process.
UCS Logistics - Simplifying IT Asset Management.

What are the steps to install a new hard drive?
Installing a new hard drive can provide valuable additional storage space for your computer, enabling you to store more data and run applications efficiently. Follow these steps to install a new hard drive successfully:
Prepare Your Workspace: Turn off your computer and disconnect it from the power source. Place the computer on a stable surface with enough room to work comfortably.
Check Compatibility: Ensure the new hard drive is compatible with your computer's motherboard and power supply. Verify the type of hard drive (e.g., HDD or SSD), the interface (e.g., SATA or M.2), and the physical size (e.g., 2.5-inch or 3.5-inch) of the drive.
Backup Data: If installing the new hard drive as additional storage, consider backing up important data from your existing drives beforehand. Although the installation process is unlikely to cause data loss, it's always better to be safe.
Locate Drive Bays: Open your computer case and locate the drive bays. These are slots where you can mount the new hard drive. If you are replacing an existing drive, identify the bay of the old drive.
Mount the Drive: If installing in an empty drive bay, attach the new hard drive securely using the screws provided with the case. Ensure the drive fits snugly in place.
Connect Data and Power Cables: Use the appropriate cables to connect the new drive depending on the type of hard drive and your motherboard's connectors. For SATA drives, connect one end of the SATA data cable to the motherboard's SATA port and the other end to the new hard drive. Connect a SATA power cable from the power supply to the drive.
Configure BIOS/UEFI Settings (If Required): Some motherboards may require you to configure BIOS/UEFI settings to recognize the new hard drive. Enter the BIOS/UEFI menu during computer startup and ensure that the new drive is detected.
Initialize and Format the Drive: Once the system recognizes the new hard drive, initialize and format it to prepare it for use. In Windows, go to "Disk Management," locate the new drive, and follow the prompts to initialize and format it with the desired file system.
Assign a Drive Letter (If Necessary): In Windows, you may need to assign a drive letter to the new hard drive so that it appears in File Explorer.
Test the Drive: Confirm that the new hard drive works correctly by accessing it in File Explorer or using disk management tools. You can also copy test files to ensure smooth data transfer.
Close the Case: After ensuring the new hard drive functions correctly, secure the computer case with screws or latches.
Update Software (Optional): If you've added the new hard drive for specific applications or data storage, consider updating software settings or library locations to take advantage of the new storage space.
With the new hard drive installed, you can now enjoy expanded storage capacity and improved performance in your computer.
UCS Logistics - Simplifying IT Asset Management.

How do I install a CPU (Central Processing Unit)?
Installing a new CPU (Central Processing Unit) can boost your computer's processing power, enabling it to handle more tasks and run applications faster. Follow these steps to install a new CPU successfully:
Prepare Your Workspace: Turn off your computer and disconnect it from the power source. Place the computer on a stable surface with enough room to work comfortably.
Check Compatibility: Ensure that the new CPU is compatible with your motherboard. Verify the socket type and generation of the CPU and compare it with the supported CPUs listed in your motherboard's manual or specifications.
Remove the Old CPU: If upgrading from an existing CPU, remove the old one. Unlock the CPU socket lever and carefully lift the old CPU out of its socket. Handle the old CPU by its edges and place it in an anti-static bag for storage or disposal.
Clean the CPU Socket: Inspect the CPU socket before installing the new CPU for any dust or debris. Use compressed air or a clean, dry brush to remove any particles that could interfere with the new CPU's connection.
Apply Thermal Paste: If your CPU requires thermal paste, apply a small amount in the center of the CPU. The thermal paste ensures proper heat transfer between the CPU and the cooler. Use an appropriate method for your CPU type, such as a pea-sized dot or a thin spread.
Install the New CPU: Carefully align the new CPU with the socket, matching the notches or markings on the CPU and the socket. Gently lower the CPU into the socket, ensuring all pins or contacts fit correctly.
Secure the CPU: Once the CPU is correctly seated, gently press down the CPU socket lever to secure the CPU in place. The lever should lock smoothly without excessive force.
Attach the CPU Cooler: If you are using the stock cooler that came with the CPU, follow the manufacturer's instructions to attach it securely. If you use an aftermarket cooler, follow the installation instructions carefully.
Connect Cooling Fan: Attach the cooling fan or pump to the appropriate CPU fan header on the motherboard. Ensure a secure connection to enable proper cooling.
Connect Power and Startup: Reconnect the power source and turn on your computer. The BIOS/UEFI may prompt you to confirm the new CPU installation. Follow any on-screen instructions to save changes and reboot.
Verify CPU Information: After booting into your operating system, check the CPU information to confirm that the new CPU is recognized correctly. On Windows, right-click "My Computer" or "This PC," select "Properties," and verify the CPU details.
Perform Stability Tests: To ensure stable performance, consider running stress tests or benchmarking software to check the CPU's stability under load.
With the new CPU successfully installed, your computer should run faster and easily handle demanding tasks.
UCS Logistics - Simplifying IT Asset Management.

What should I do if my hardware isn't detected after installation?
If your computer doesn't detect your newly installed hardware, don't fret! There are several steps you can take to troubleshoot and resolve the issue:
Check Connections: Ensure all connections related to the new hardware are secure. Double-check data cables, power cables, and any other connections relevant to the hardware installation.
Restart Your Computer: Sometimes, a simple restart can help the computer recognize the newly installed hardware. Restart your computer and see if the hardware is detected afterward.
Update Drivers: Visit the manufacturer's website and download the latest drivers for the new hardware. Outdated drivers can cause detection issues, and updated drivers may resolve the problem.
Check BIOS/UEFI Settings: Enter the BIOS/UEFI settings during computer startup and verify that the new hardware is detected in the relevant sections (e.g., "Advanced," "Hardware Monitor," or "Peripheral Configuration"). Ensure that the hardware is enabled and properly recognized.
Reset BIOS/UEFI Settings: If you made any changes in the BIOS/UEFI settings during troubleshooting, but the hardware is still undetected, consider resetting the BIOS/UEFI settings to their default values. This can help eliminate any incorrect configurations.
Test on Another System (If Possible): If you have access to another compatible system, try installing the hardware on that system to see if it gets detected. This can help determine if the issue lies with the hardware or your computer.
Check for Hardware Conflicts: Verify that there are no hardware conflicts with the newly installed hardware. Conflicts can occur if there are resource-sharing issues between devices. In Windows, you can check for conflicts in the Device Manager.
Reinstall Hardware (If Necessary): In some cases, reinstalling the hardware may resolve detection issues. Carefully uninstall the hardware, restart the computer, and then reinstall the hardware following the correct installation steps.
Check for BIOS/UEFI Updates: Visit the motherboard manufacturer's website and check for BIOS/UEFI updates. Sometimes, updates can improve hardware compatibility and detection.
Seek Professional Help: If you have tried all the above steps and the hardware is still undetected, consider seeking help from a professional technician or contacting the manufacturer's support.
Remember, hardware detection issues can be resolved with patience and troubleshooting. Following these steps increases the chances of successfully detecting and using your newly installed hardware.
UCS Logistics - Simplifying IT Asset Management.
Takeaways from the Article:
Importance of Hardware Installation Knowledge: In the modern technological era, understanding hardware installation is vital for enhancing computing experiences and for those interested in DIY computer building.
Driver Installation Process: The article provides a detailed guide on how to install hardware drivers, emphasizing the importance of identifying the correct hardware, visiting the manufacturer's website, selecting the right driver, and following the installation process.
Essential Tools for Hardware Installation: A list of essential tools for hardware installation is provided, including a screwdriver, anti-static wrist strap, flashlight, cable ties, thermal paste, magnifying glass, and spare screws.
Guides on Specific Hardware Installations: Step-by-step guides are provided for installing specific hardware components such as graphics cards, RAM, hard drives, and CPUs.
Precautions Before Hardware Installation: The article emphasizes the importance of taking precautions before installing hardware, such as powering off devices, grounding oneself, reading manuals, and ensuring compatibility.
Reminder Of The Post’s Main Point: The article "Unraveling the Wonders of Hardware Installation" serves as a comprehensive guide on the importance, processes, and precautions of hardware installation. It aims to equip both tech enthusiasts and beginners with the knowledge to successfully integrate new components into their systems.

